Learn how to generate a database with a code-first flow using EntityFramework Core in a Web API project.
TL;DR: This article will show you how to build your Web API with the new ASP.NET Core 3.1 and how to integrate with EntityFramework Core in order to provide a backing database for retaining data. Following the steps described in this tutorial, you will end up building a simple Web API project, whose full code you can find in this GitHub repository.
[toc]
Create an API in Visual Studio
The first step is to create an API solution in Visual Studio. If you already have a project in place, skip to the next step.
Before starting to create an API, ensure that you have Visual Studio installed. This will bring along the .NET Core SDK and required dependencies. These instructions are created using Visual Studio for Mac with .Net Core 3.1. If you are on Windows, the steps are likely to be similar.
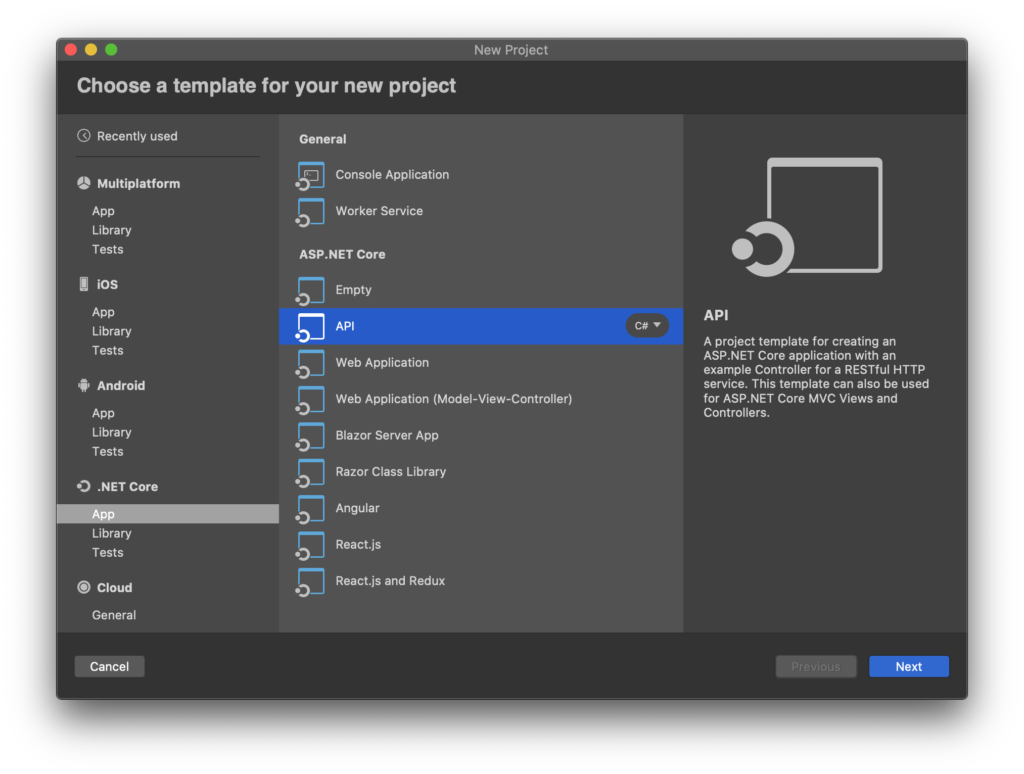
In Visual Studio, click File > New solution and select API template.
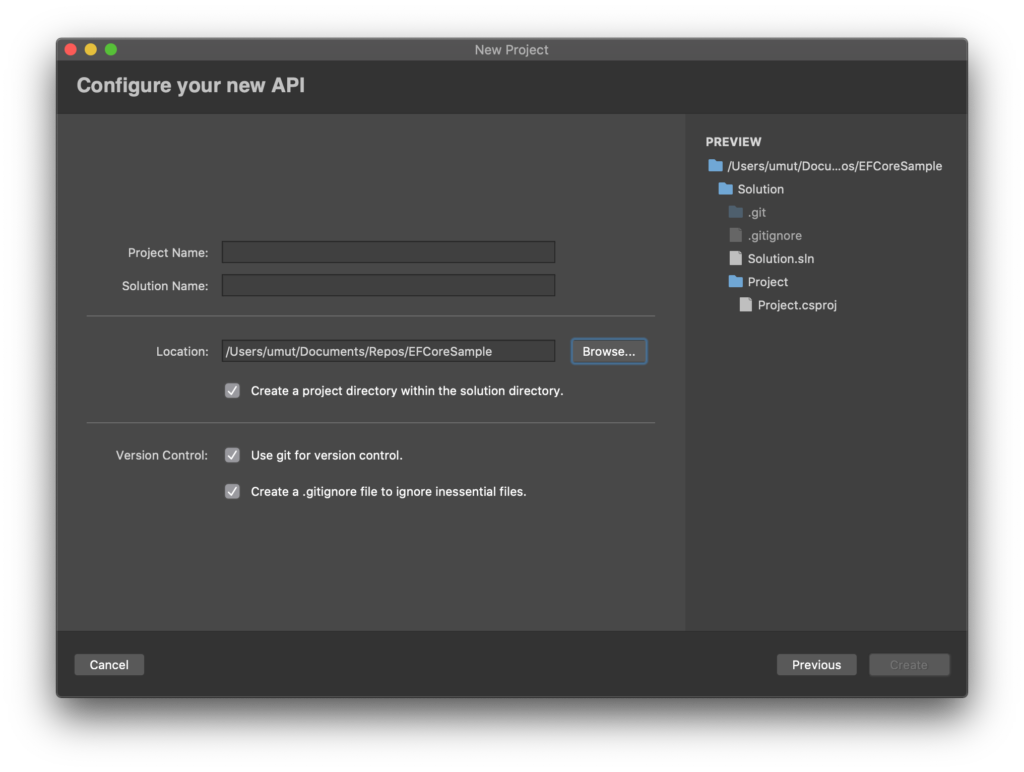
Next step is to give your project a name and configure the template.
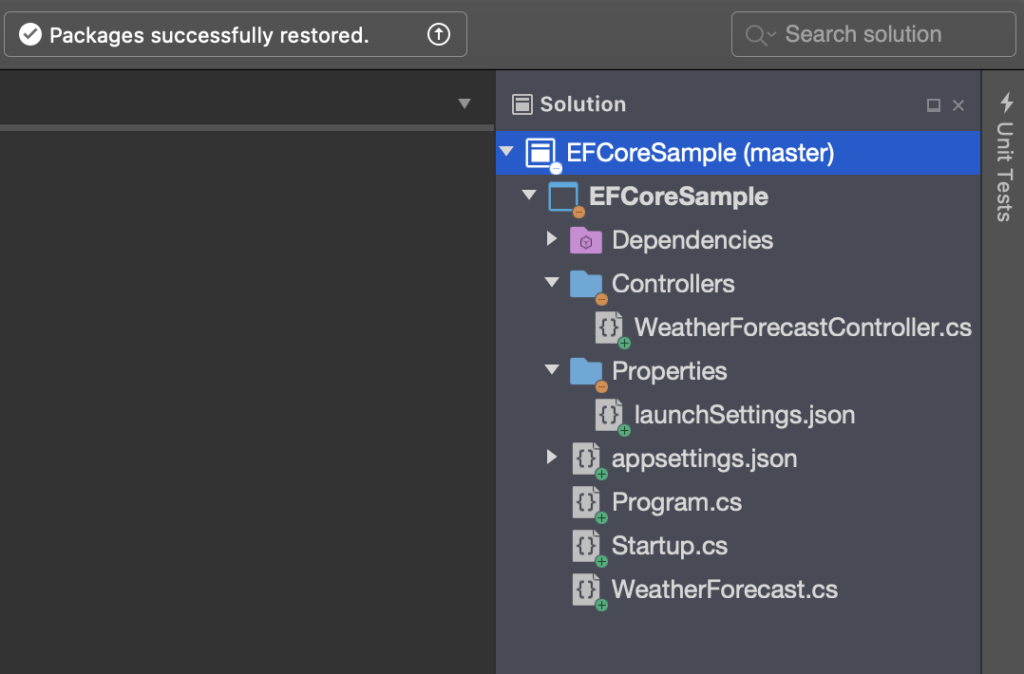
You should now see the project structure in Visual Studio solution explorer.
Go ahead and launch the API against a browser, which should open a new window with sample data coming from the WeatherForecastController.

Now that we have an API in place, we are ready to generate a database using EntityFramework Core.
Add NuGet packages
The following NuGet packages exist in the nuget.org package feed. This should already be configured in Visual Studio.
Microsoft.EntityFrameworkCore
Microsoft.EntityFrameworkCore.SqlServer
Microsoft.EntityFrameworkCore.DesignCode language: CSS (css)Navigate to Manage NuGet packages window by right clicking on the solution and search for the packages above.
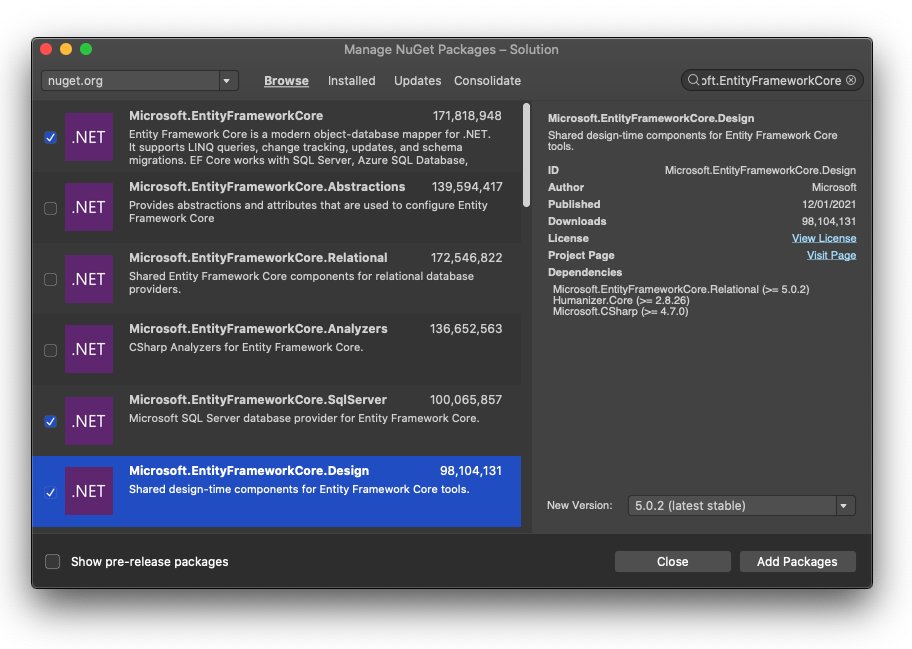
You may be asked to install other EntityFrameworkCore.* packages as you install these packages.
Create database context
In order for EntityFramework to create tables for our model classes, we need to create a class that inherits from DbContext.
public class AppDbContext : DbContext
{
    public DbSet<Book> Books { get; set; }

    public AppDbContext(DbContextOptions<AppDbContext> options) : base(options)
    {
    }
}Code language: C# (cs)
Through conventions, EntityFramework will recognise the DbSet properties declared in the context and create/update table SQL table definitions accordingly. AppDbContext should live in a folder called Data or Infrastructure, to help you establish nicely separated namespaces.
This is also a good place to define column restrictions, manual relationship setup etc. via OnModelCreating hook.
Register the context at Startup
The next step is to register the context with the Startup.cs file as shown below.
public class Startup
{
    public Startup(IConfiguration configuration)
    {
        Configuration = configuration;
    }

    public IConfiguration Configuration { get; }

    // This method gets called by the runtime. Use this method to add services to the container.
    public void ConfigureServices(IServiceCollection services)
    {
        services.AddDbContext<AppDbContext>(cfg =>
                cfg.UseSqlServer(Configuration.GetConnectionString("DbConnection"))
        );

    // omitted for brevity..
}Code language: C# (cs)
Notice the call to UseSqlServer method, where I specify the connection string from the configuration file. By default, appsettings.json is the config file used in non-development environment, while appsettings.Development.json is used for development environment.
These configuration files should have relevant connection strings. An example of a development configuration is below.
{
  "Logging": {
    "LogLevel": {
      "Default": "Information",
      "Microsoft": "Warning",
      "Microsoft.Hosting.Lifetime": "Information"
    }
  },
  "ConnectionStrings": {
    "DbConnection": "Server=localhost,1433;Database=MyDatabase;User=sa;Password=RandomPassword@1"
  }
}Code language: JSON / JSON with Comments (json)
Generate first migration
A migration contains a set of changes and a rollback plan for EntityFramework to execute. Every time you make a change to DbSet classes, a migration needs to be created to allow EntityFramework to keep the database up to date.
To generate your first migration, open a terminal window and navigate to project folder. Then run the migration command below.
cd myprojectpath
dotnet ef migrations add FirstMigrationCode language: Bash (bash)
Running commands above will create a Migrations folder in your project, containing files that has instructions for EntityFramework to generate the database.
Migrate database on startup
At this point, your database is still not created. That is because we have not instructed EntityFramework Core to run the first migration we generated.
I prefer to auto-migrate the database when the API starts, instead of manually running migrations. This has the added benefit of not having to run migrations against remote environments such as staging/prod. As soon as the API starts, the database will be created/migrated by EntityFramework.
The first entry point of the API, Program.cs, contains a Main method, which is responsible for building the web host to start the API. This makes it a great place to run our auto-migration code to keep the database up to date.
public static void Main(string[] args)
{
    var host = CreateHostBuilder(args).Build();

    using (var scope = host.Services.CreateScope())
    {
        var services = scope.ServiceProvider;
        var context = services.GetService<AppDbContext>();
        context.Database.Migrate();
    }

    host.Run();
}

//.. rest of the codeCode language: C# (cs)
The code above pulls out the context we registered in Startup.cs and invokes Migrate to run all of the migrations in the project.
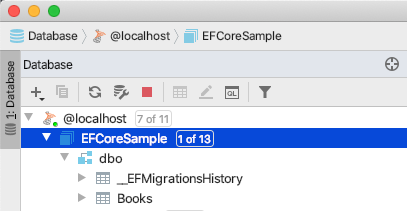
When you run the API, the database should be created with tables matching DbSet properties in the context file.