
Angular is a single page application (SPA) development framework for well-structured, testable and maintainable front-end applications. It is one of the most-widely used application framework in the world. According to Stack Overflow Developer Survey, Angular is used by 36.9% participants. Angular’s popularity is due to its compatibility across platforms. Apps written with Angular can run on the web, natively on mobile and desktop platforms.
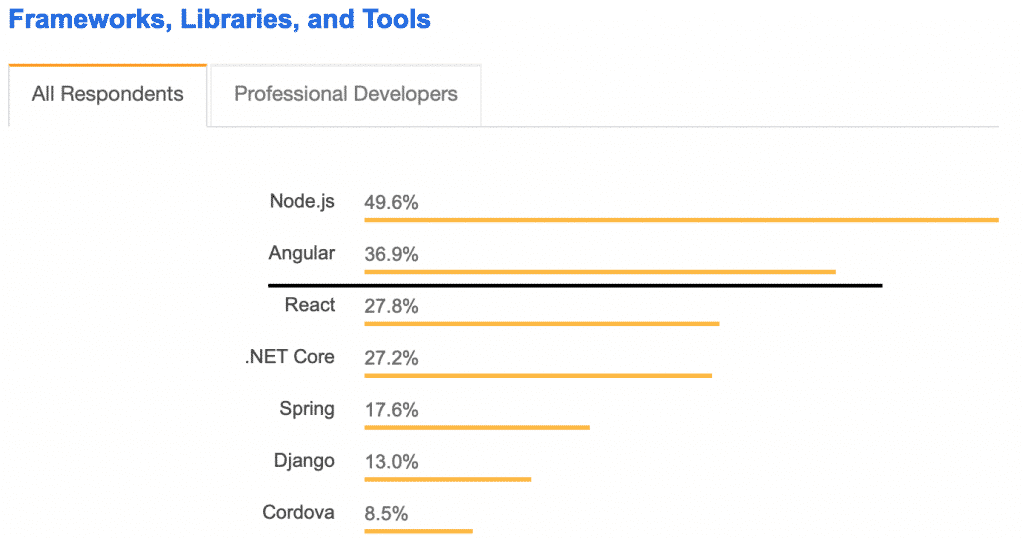
Table of contents
What do I need know?
Angular web apps are written with Typescript, HTML & CSS.
You don’t need to be an expert in these technologies to use Angular. If you have ever used them, you should be good to go!
In case you don’t know what TypeScript is, it is a superset of JavaScript language. It has a lot of useful features to JavaScript like compile-time checking, intellisense, classes, interfaces! These features are currently missing from JavaScript so TypeScript lets us implement them. In fact, TypeScript is so good even Angular is written in TypeScript.
Just note that browsers don’t understand TypeScript. TypeScript code must be transpiled (compiled) into Javascript. Transpiling is the process of converting typescript code into JavaScript, which is compatible with most web browsers today. In this tutorial, we will use a project template so there’s nothing you need to do.
Get the tools
You only need a couple of things out of the way to get up and running with Angular.
Download and install NodeJS, which will also install NPM (node package manager). NPM is for getting all required libraries for working with Angular.
If you have a Mac, use Terminal for executing the commands in this tutorial.
Git Bash for Windows works best for Windows based on my experience.
Verify Node installation by running node -v and npm -v in Terminal/Git Bash.
Install Angular CLI (Command-line Interface)
Angular heavily relies on code generation. Mundane tasks like creating the file/folder structure, adding dependencies for a functioning project can take quite a bit of time and effort. Obviously, time is money so if you’re like me you’ll love using the CLI as your slave!
Begin by installing the CLI globally by executing the following in your Terminal:
npm install -g @angular/cliCode language: Bash (bash)If you’re not familiar with working in the command-line, let me break it down for you:
We use npm install command for installing a package from the remote node package repository.
The -g flag indicates that we want Angular installed globally, meaning where-ever you might be in your system (via Terminal) you can use Angular).
As you may have guessed, @angular/cli is the name of the package to install.
Generate the app
Navigate to a folder to generate your app by using the cd command.
cd Desktop/ReposCode language: Bash (bash)and see the list of files & folders in that directory with the ls command. Once you’re in a suitable location, generate your first app using the ng new command.
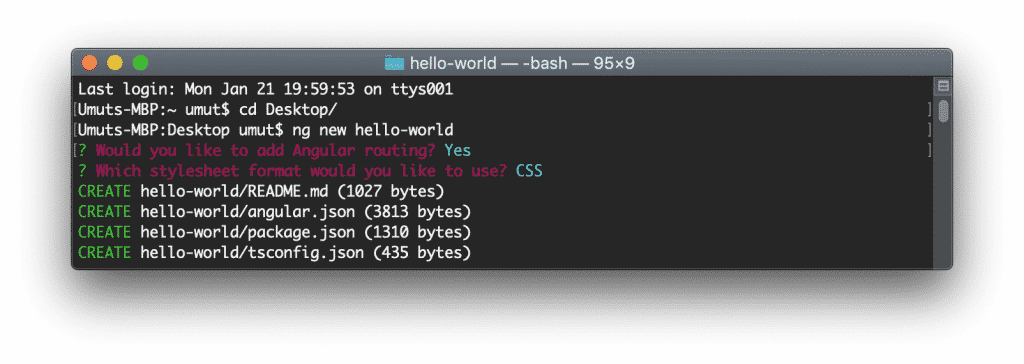
ng new hello-worldCode language: Bash (bash)The above command will prompt you a series of questions to generate a blank app for you. I chose to add routing and picked CSS as the stylesheet format.
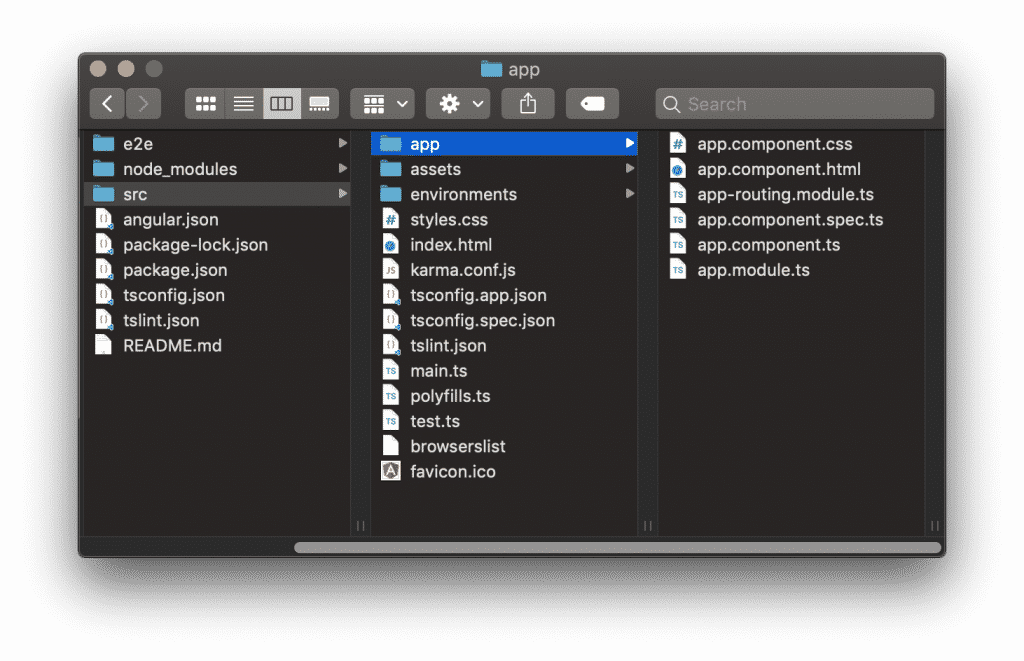
This is what ended up in my hello-world folder:
We’re now ready to serve our application! Navigate to the project folder using the cd command and run the app with ng serve. Pass --open to automatically open a new browser window to run the app.
cd hello-world/
ng serve --openCode language: Bash (bash)
Angular spins up a new local HTTP server and serves our app in a new window.
Our app is running in watch mode by default, which means if you make a change the app will reload automatically.
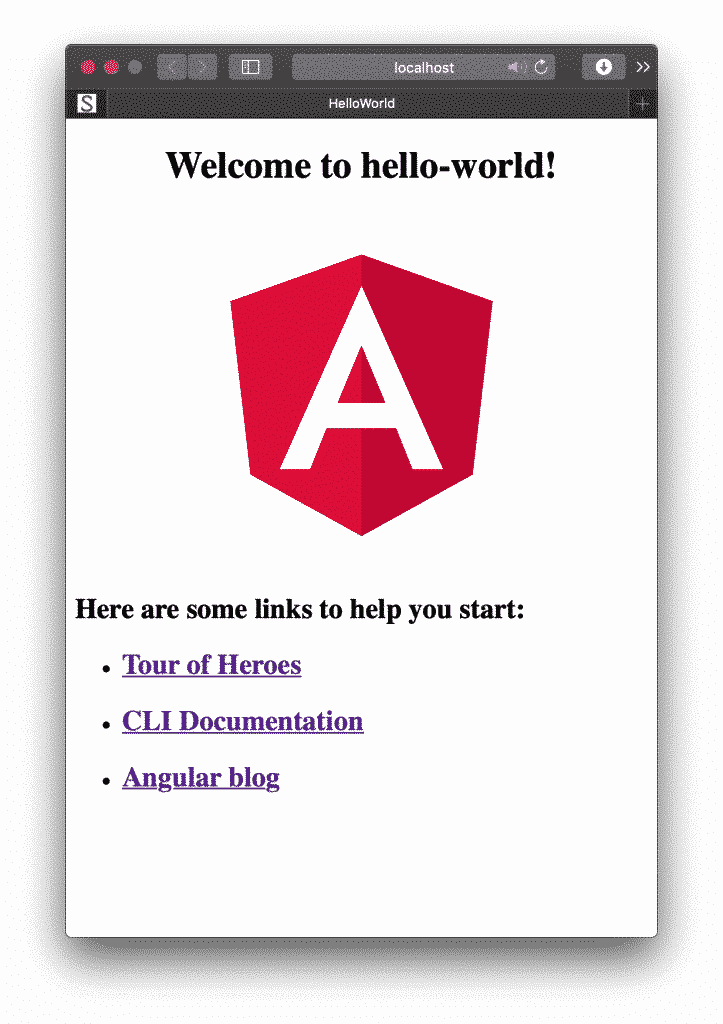
That’s it, our brand-new Angular app is now working!
Angular project structure
As you can see below, there are quite a few number of files in the application folder. Let’s explore the main folders and files in our newly generated Angular project.
Root Folder
- src: Source folder is where we keep all files that make up the app – this is the most important folder.
- app: This is where all the juicy stuff goes into. You will create all the components, modules, views and services in this folder.
- assets: Static text files, JSON files, images should be in here.
- environmentsThis folder is to manage the different environments such as development and production. For example we could have a local API for development environment and a live API for production environment. When we run
ng serveit will be used by default the development environment. If you like to run in production mode you need to add the--prodflag tong servecommand. - styles.cssGlobal style sheet file.
- index.htmlThis is the host page of our Angular app. It will serve as the placeholder and you won’t be changing this file often. Angular compiler will inject all required JS, HTML and CSS files into this file automatically with webpack.
- e2e: A folder for keeping end-to-end tests, written in Jasmine and run by the protractor e2e test runner.
- node_modules: A folder to store all installed dependencies from npm. This folder is auto-generated when you create the app for the first time or run
npm installon a different machine. This folder is huge so never put this folder in source-control. - angular.json: This is a configuration file that tells the build system which files to change when you use commands like
ng buildandng serve. - package.json: As every modern web application, we need a package system and package manager to handle all the third-party libraries and modules our app uses. Inside this file, you will find all the dependencies and some other handy stuff like the npm scripts that will help us a lot to orchestrate the development (bundling/compiling) workflow.
- package-lock.json: This is automatically generated for any operations where npm modifies either the node_modules tree or package.json.
- tsconfig.json: Typescript configuration file.
- tslint.json: Configuration for static analysis linter for the TypeScript language.
Angular application architecture
So, we now know how to generate a new Angular application and the most important files & folders in the app.
Let’s learn about Angular application architecture.
There are three fundamental building blocks in Angular applications:
- Components
- Modules
- Services
If you look at the app folder under src, you’ll notice it has a few files..
- App Component
- app.component.ts
- app.component.html
- app.component.css
- app.component.spec.ts
- App Routing Module
- app-routing.module.ts
- App Module
- app.module.ts
Summary
In this angular step by step tutorial we went from the basic concepts and why’s of Angular Framework to generating a hello world Angular app. We looked at what files and folders are generated by the CLI.
Check out my free Angular Material starter template. It is built with Angular, Angular Material and other popular open-source packages to get you started on your next project!

![Read more about the article Making Styles Work with [innerHtml] in Angular](https://onthecode.co.uk/wp-content/uploads/2022/12/Angular-768x402.png)